***Please note that Integromat evolved into Make in February 2022. All content for Integromat is also valid for Make.***
Pushing your existing customer contact details such as email and phone number may be a crucial part of your prospecting (for lookalikes) and remarketing strategy. As always, this can be done manually by uploading CSV files to Facebook from time to time or you can automate the whole process. In my sample exercise, I assume that my customer emails and phone numbers are populated into a Google Sheet which I will be using as source for my Integromat scenario which will be pushing the new customers to Facebook Audiences fully automatically.
Integromat is an advanced automation platform which allows you to make various online services talk to each other. In my scenario, I will be connecting Google Sheets with Facebook Audiences. You will learn that it’s a quite easy process which requires no coding skills.
Disclaimer:
- Using personal information such as emails and phone numbers for marketing purposes needs to be in accordance with your local law.
- If you end up buying an Integromat license, I may end up getting commission depending on your conversion path.
Step by Step Guide
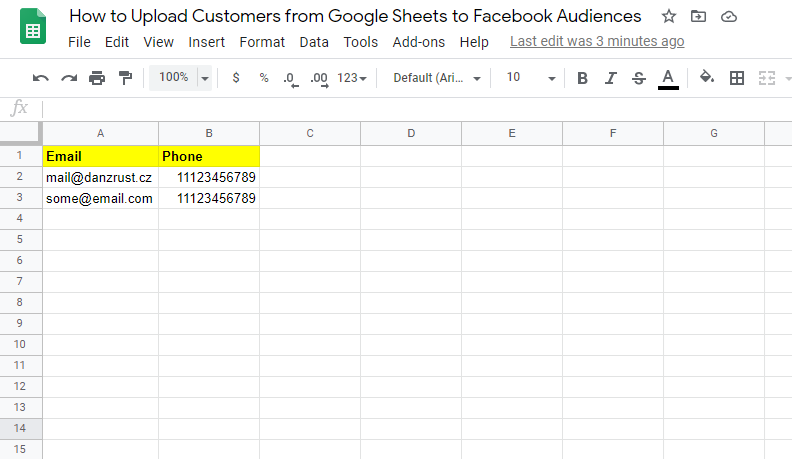
Let’s assume we have a very simple table with 2 columns Email and Phone. The goal is to upload the contacts to a Facebook Audience at regular intervals.
First of all, you need to create a target custom audience in the Facebook interface. My audience name is “ExcelinPPC.com Subs from Integromat”. You’ll have to manually upload at least one legit contact so the audience gets created in Facebook and so you can later work with it in Integromat.

Now it’s time for real Integromat magic. If you don’t have an Integromat account yet, please go ahead and create one.
Integromat offers a free tier in which you can create 2 scenarios. That way, you’ll get an idea whether it’s worth paying or it or not. Personally, I am on the $10/month tier.
After you create your account, locate the “Create a new scenario” button:

For simplicity, you can skip this part and just press the “Continue >” button.

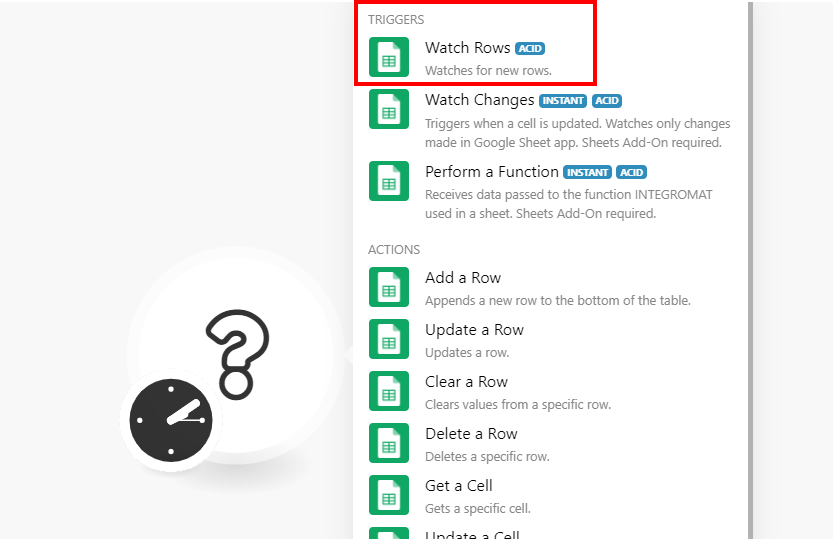
At this point, you are starting to work on your “scenario” which is a series of events which will take place when your “scenario” runs. As mentioned in the beginning, we want to read new customers from a Google Sheet and push them to Facebook Audiences. So click the ? and start searching for “google sheets”:

Then you want to select “Watch Rows”:
Now you need to locate your source spreadsheet and sheet within the spreadsheet. Also set a reasonable “Limit” number. The limit says how many times the scenario can repeat when new customers are found in the spreadsheet. If the spreadsheet gets 250 new contacts in between the scenario runs (we’ll set the schedule later), then you should set this number to 250 or higher. When you are done, click “OK”.

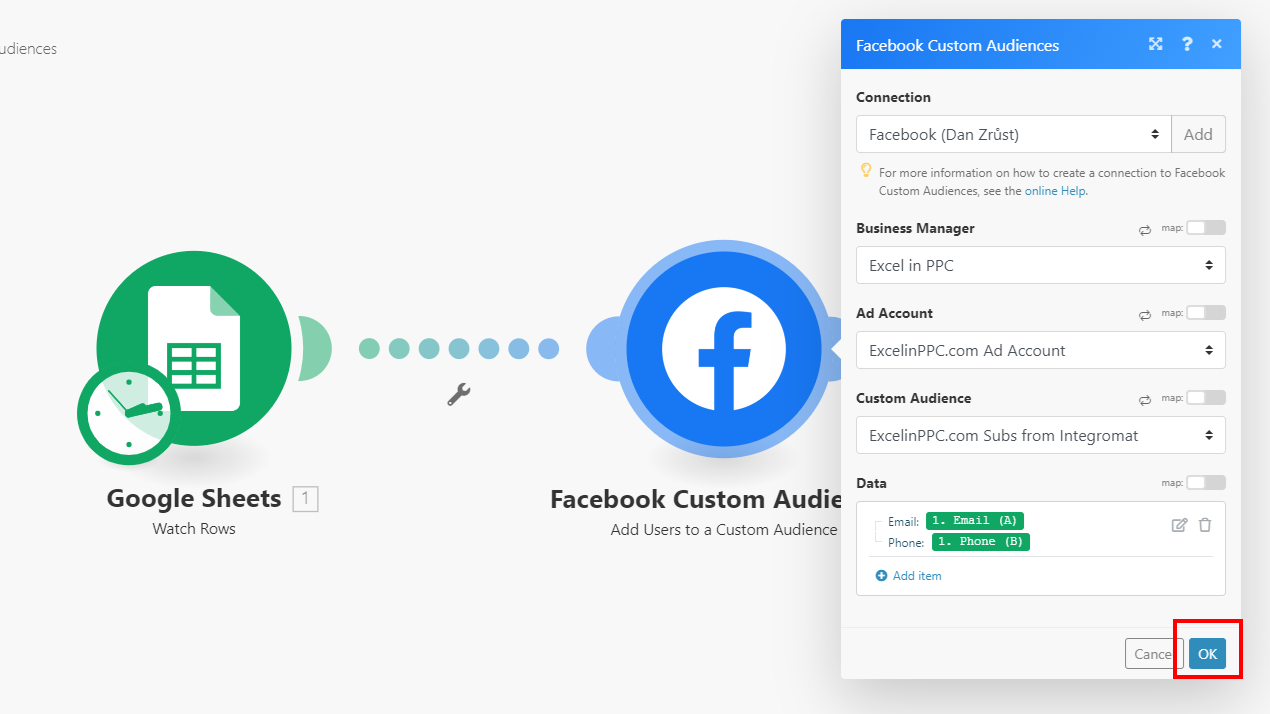
By now, we’ve successfully linked our scenario to the source Google Sheet and it’s time to push new contacts to Facebook Audiences. Locate the “+” and start searching for “facebook”. You’ll be offered several modules. You are interested in “Facebook Custom Audiences”. Select it:
Within the module, you want “Add Users to a Custom Audience”:

Now, it’s authentication time! If you have not linked Integromat with Facebook yet, you’ll need to create “connection” via the “Add” button at the top. Simply login to Facebook with your user credentials. When you get back, select the Business Manager, Ad Account, and finally… the target custom audience. In my example, the audience is called “ExcelinPPC.com Subs from Integromat”. As mentioned earlier, the audience needs to already exist so you can see it in the dropdown list.
After you are done with dropdowns, click “Add item” in the Data section:

Facebook allows you to upload fields such as Email, Phone, Gender, Birth year, Birth month. In my example, I will be only uploading Email and Phone. Click into the empty Email field and Integromat will start suggesting which values (the green ones) from your source Google Sheets can be used. Logically, you want to put Email into Email and Phone into Phone. It’s that simple.
Leave the other fields blank if you don’t have data for them.

The configuration looks like this:

Notice the Data section now contains the mapped fields. Hit “OK”.
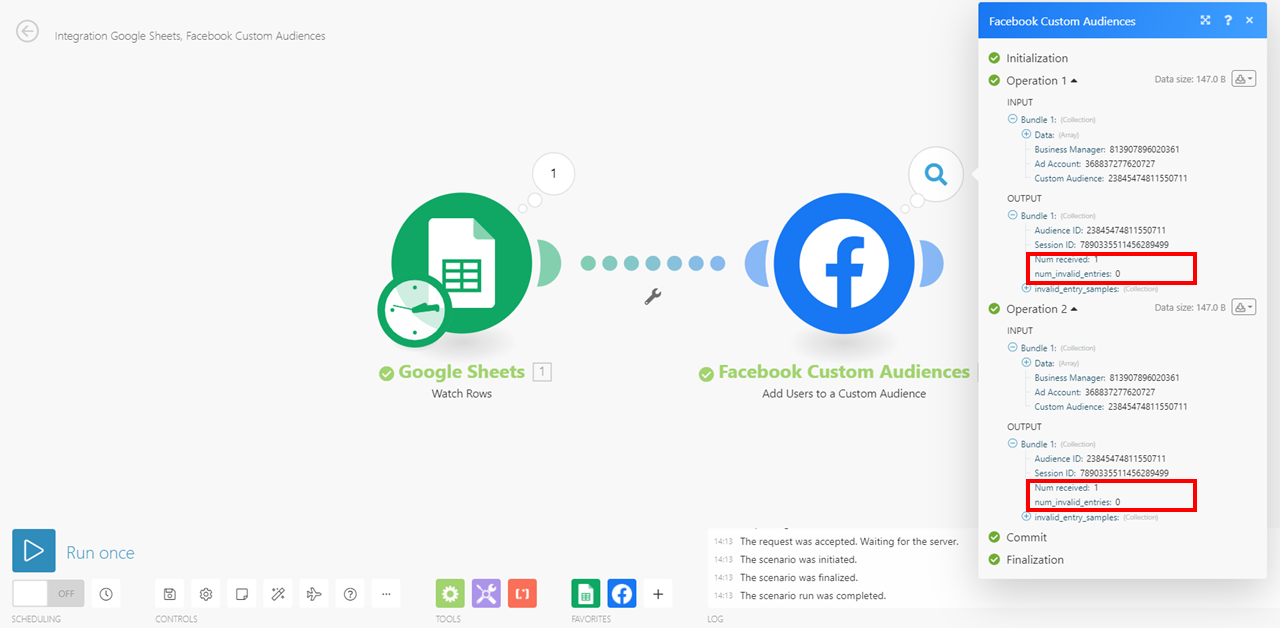
Now you can “Run Once” your scenario. If everything goes well, you’ll see green tickers and numbers on the top of each module. Let’s see what happens after clicking the highlighted “2”:
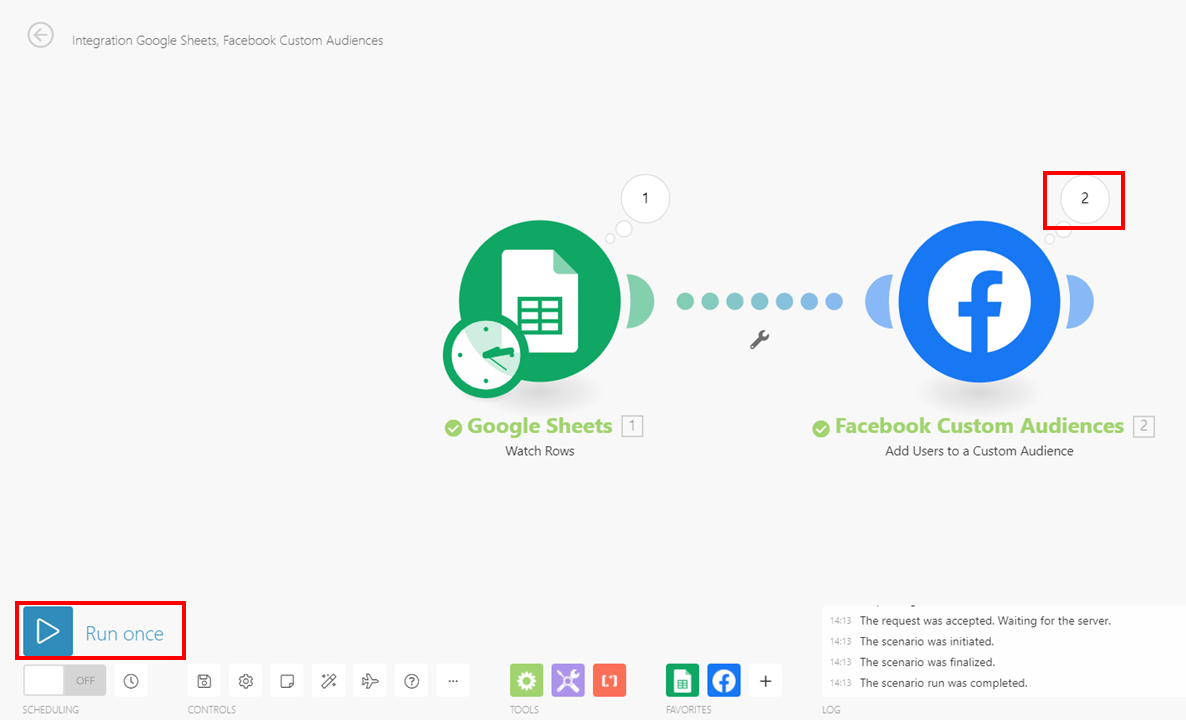
I can actually see whether my upload was successful on the customer level. I can see that I did 2 successful operations and both contacts went through because I have 0 “num_invalid_entries”:
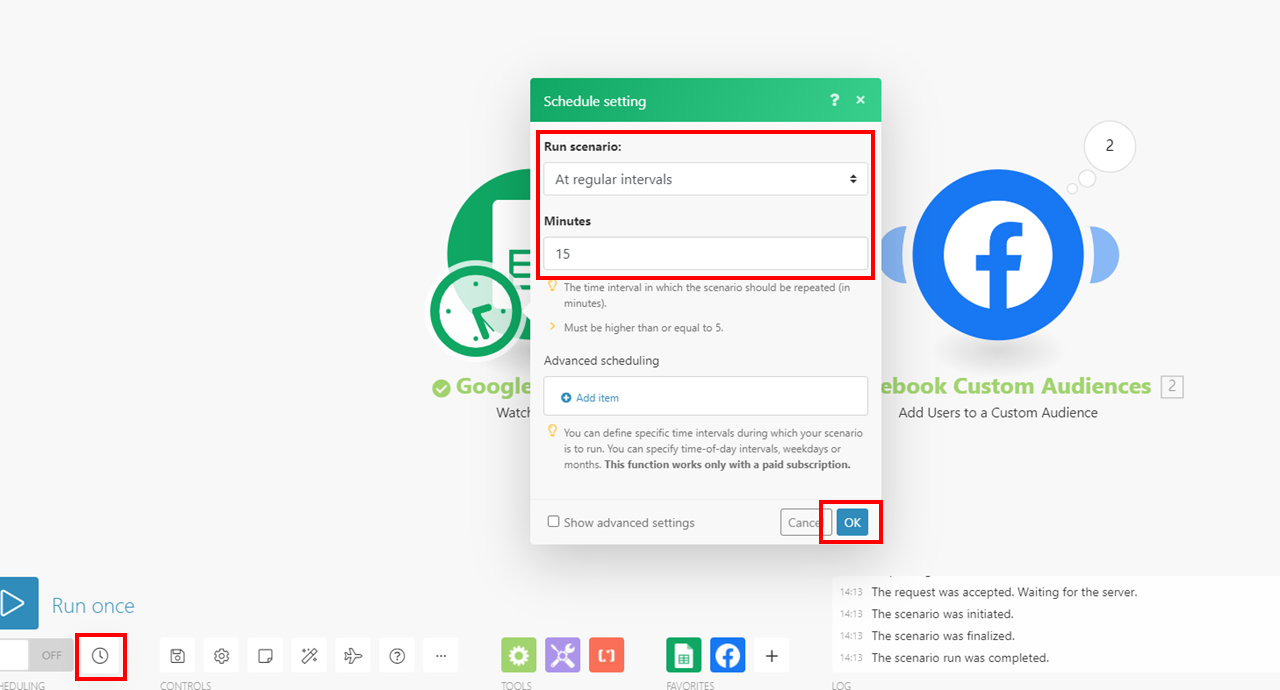
Now the final touch. You want to schedule the pushes from Google Sheets to Facebook Audiences. You can set the schedule by minutes, hours, day, weeks… Just bear in mind that the more frequently you run the scenario, the more operations it’ll consume.
You can also check Facebook UI and see the “Last edited” date of your custom audience. If you did everything right, you should see today’s date.

Conclusion
That did not hurt, did it? The more you start playing with Integromat, the more you will start automating. This scenario actually takes ~15 minutes to setup if you know how to do it. And you now know how to do it :). You no longer have to upload your contacts to Facebook Custom Audiences manually.